
Back to Loco of the Month homepage
Back to Sidestreet Bannerworks
.
February 2007
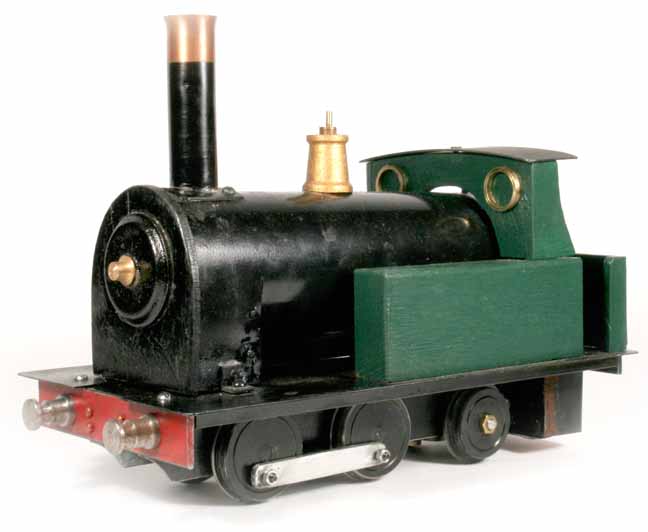
Ken Paxton's wooden 0-4-2T
by Marc Horovitz
(The Ogden Botanical Railway is still snowbound, with no end in sight, so for the second month in a row the Locomotive of the Month will be examined indoors.)
The engine
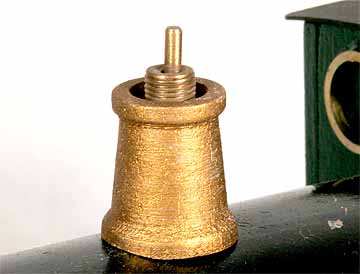
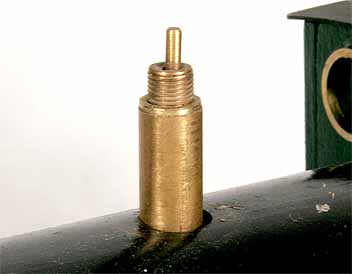
I procured this engine via eBay and have never seen anything like it. It has a Smithies boiler with two water tubes, but no blower. A safety valve sits on top and a traditional screw-type throttle is the only backhead fitting. Atop the throttle housing is a brass plug. You can unscrew this and put a few drops of steam oil directly into the steam line through the hole.
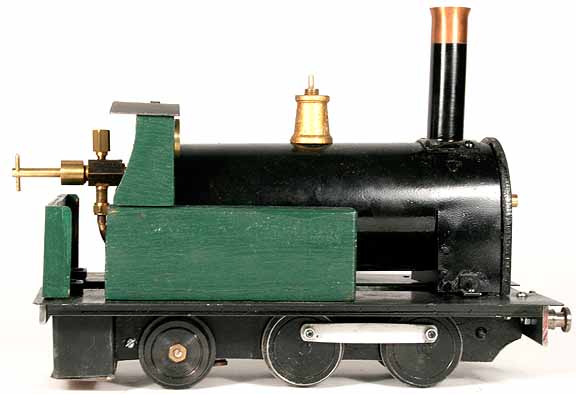
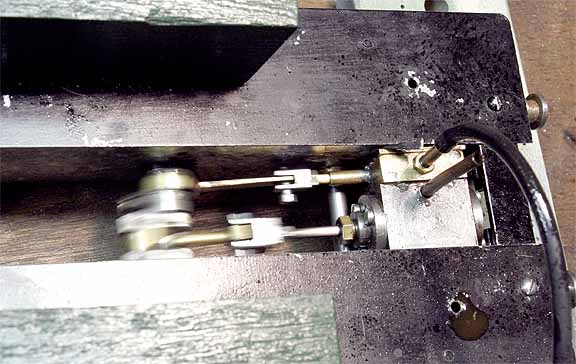
The steam line runs forward through the fire for a little superheat. There is a single fixed cylinder between the frames, controlled by a D-valve with slip-eccentric reversing. The steam line is connected to an admission pipe into the valve chest with a piece of silicone tubing. The exhaust line points up the stack.
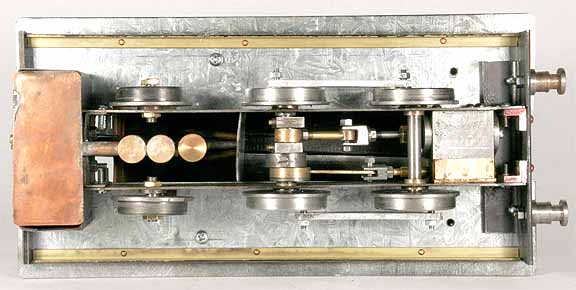
The frame, footplate, and outer boiler shell are made of galvanized steel. The boiler is copper. The burner is more or less standard, with three wicks (cotton!). It is held in place with a single pin that can be withdrawn to drop it.
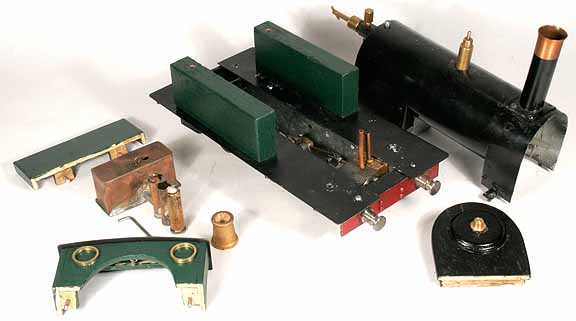
This all sounds pretty straightforward, so far, but here's the fun part. The upper cab, the dummy side tanks, the backsheet and the smokebox front are all made of wood. The dummy side tanks are solid blocks, screwed to the footplate. The cab top and the backsheet are held in place by gravity, aligned with pins. The smokebox front just pulls out. It is an extremely light press fit, the smokebox proper just resting on a thumb tack inserted into the top edge of the smokebox front. The rear wheels, because of the placement of the burner, are not on a single axle. Instead, each is screwed directly to the frame on a stub axle, leaving the space between the frames clear.
The boiler, too, is held in place by gravity, resting on the footplate front and rear, with alignment pins in the front. The locomotive can be reduced to its major components in less than a minute!
The run
So, does it run? Well. . .sort of. I took it apart and propped the chassis up on blocks, placing a tube from my compressor over the steam inlet. After turning on the compressor, the first thing I noticed was massive blow-by, either past the valve or a poorly packed piston, or both. I gave the moving parts a good lube and turned the wheels. Yes, it did run, despite all the blow-by, although noisily, with a lot of knocking. The rod ends are just riding on screw threads -- there's little precision work here. The frames are fairly thin and I found that if I stuck a little wooden wedge between the frame and the valve chest, it improved cylinder alignment and, hence, performance.
With that hurdle past, I decided to fire it up, not without trepidation. Although the engine has a safety valve, I had no idea at what pressure it was set. Also, would I immediately burn off all the paint or set the wooden parts alight? There was only one way to find out.
I reassembled the engine, dropped a little steam oil down the "lubricator," and put some water in the boiler. I again propped the unit up on blocks, filled the fuel tank, and lit the wicks. The inner boiler barrel is fairly small, compared to the outer shell. That gave plenty of space for the fire. In looking down the front, with the smokebox door off, I could see the flames licking the inner barrel, which was good. With the door replaced, I could instantly feel heat coming from the large smoke stack, so the engine was getting a fair amount of natural draft. Good enough.
After a few minutes steam came up. I opened the throttle and turned the wheels a few times to get the condensate out. The engine started to run, but much of the steam just went out the top as blow-by, causing the boiler to quickly lose pressure. I closed the throttle to let pressure build again. This time, I set the engine on the shop floor and opened the throttle. The locomotive actually traveled a few feet under its own power before pressure dropped.
I feel that if the blow-by problem was solved, the engine would actually run. The paint didn't burn off, nor did any of the wooden parts catch fire. Even the inside of the wooden smokebox front, which appears to be just varnished plywood, was unscathed -- no scorching or singeing. I think this remarkable piece of work is truly a valuable lesson in just how much you can get away with when designing and building a working model locomotive.
|
|
|
| Builder | Ken Paxton (Australia) |
| Date built | 2006 |
| Gauge | 1 (45 mm) |
| Scale | None |
| Boiler | Smithies with two tubes (no blower) |
| Fittings | Safety valve, throttle |
| Fuel | Alcohol |
| Blow-off pressure | Unknown |
| Cylinders | One, double-acting D-valve |
| Reversing gear | Slip eccentric |
| Lubricator | Flow-through (don't quite know what to call it) |
| Weight | 4 pounds, 10 ounces |
| Dimensions | Length, 9-3/4"; width, 5"; height, 7-3/8" |


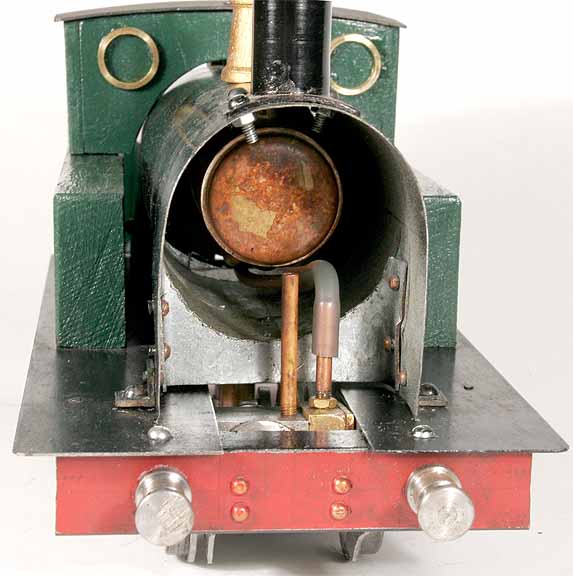
Right: With the front removed, all is revealed. The silicone tube is the steam line. Construction is largely screwed and riveted. The actual boiler barrel is clearly visible within the larger outer shell. Aside from the boiler, sheet-metal work is mostly galvanized steel.
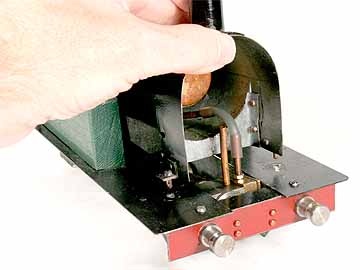
Below: It took less than a minute to disassemble the engine to this state. Note the "blind" spectacle rings on the cab front. This is definitely an easy-to-work-on engine.

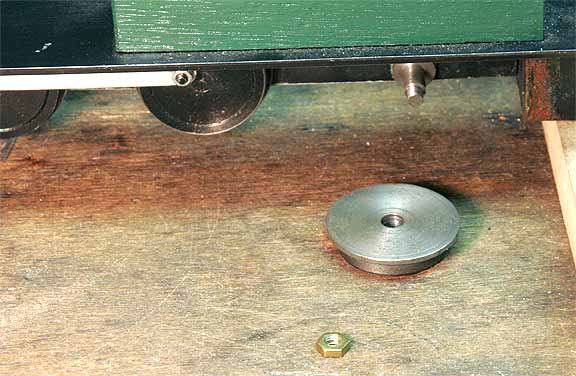
Above: Vibration from the running test caused a wheel to fall off. No worries -- it screwed right back on.
Back to Loco of the Month home page
Back to Sidestreet Bannerworks home page
This page and its contents
Copyright Sidestreet Bannerworks, 2006
.